How to Install WordPress Locally on Windows?
You might sometimes find more convenient to work with WordPress on your local machine. But if you aren’t aware of installing WordPress locally, you might wonder if you can manage it on your own or you need any help.
Do you know you can install WordPress locally in a few simple steps? If you want to experiment with development projects, test out new features, or build a WordPress site before pushing it live, a local WordPress install can let you do that.
In this post, you will learn about installing WordPress locally on Windows and Mac, using DesktopServer, WAMP, XAMPP, or MAMP.
Let’s start!
An Introduction to Installing WordPress Locally
When you install WordPress locally, you can gain several benefits. For example, if you are traveling and don’t have access to Wi-Fi, you may require a local install to continue your work.
Additionally, when you want to manipulate files and edit locally, a local install can work faster. To run the local install, there isn’t much setup involved to get it up and running.
While installing WordPress locally, you need to get a local AMP stack set up on your machine. In WordPress, AMP stands for Apache, MySQL, PHP. These software are needed to imitate the software used by a managed WordPress host on its web server.
You can do this using several methods. WAMP, XAMPP, and MAMP are the commonly used options.
But, they are designed in such a way that they can work with variety of other software and tools and need a bit of learning. Therefore, let’s first introduce you to DesktopServer, which was actually designed and optimized specifically for WordPress as a local AMP stack.
Steps to Install WordPress Locally With DesktopServer
DesktopServer is ServerPress’s WordPress product that makes it easy for you to install WordPress locally:
You can launch a new development install within seconds in just a button’s click. You get support for multisite and WP-CLI and it works on both Windows and Mac.
Free as well as premium versions are offered by ServerPress. In premium version you will get some advanced features such as:
- Multisite support
- Import and export of third-party backups
- Deployment directly to your live site
- Bypassing any login plugins
You can select the version that fits you best depending on your needs. For quick testing, the free version works well.
Step 1: Download DesktopServer to Your Computer
For installing WordPress locally, first download DesktopServer from its website. You will find both a Windows version and a Mac version. For this example, we will use the Windows version.
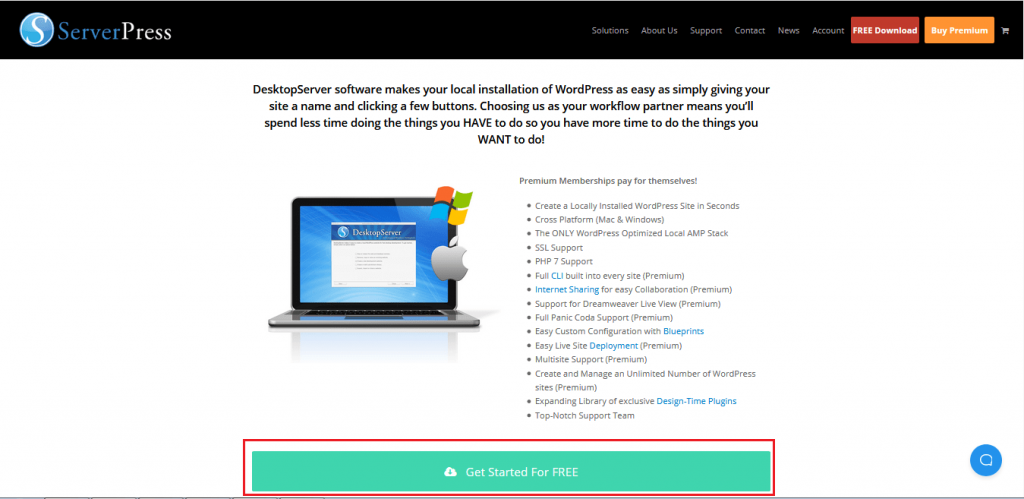
Go to the ServerPress website and click on the Free Download button in the top right-hand corner for DesktopServer (or Buy Premium if you want to):
With this, the .zip file will be automatically downloaded to your computer.
Step 2: Launching the DesktopServer Installer
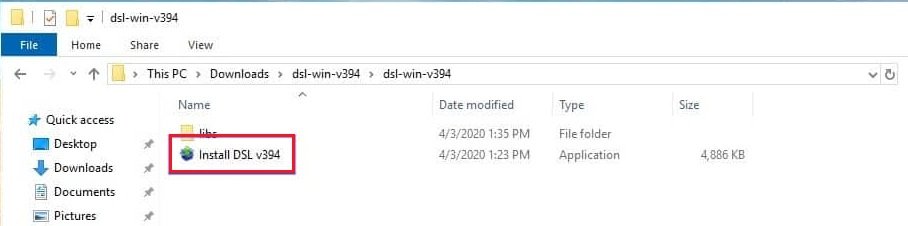
After downloading the file, launch the DesktopServer installer. Before that unzip the file you just downloaded. Be patient till it gets complete.
Then click on Install DSL:
At first, you will be asked to restart with administrator privileges. Select Continue. Next you will be asked to accept the terms of services, and select an option for your installation:
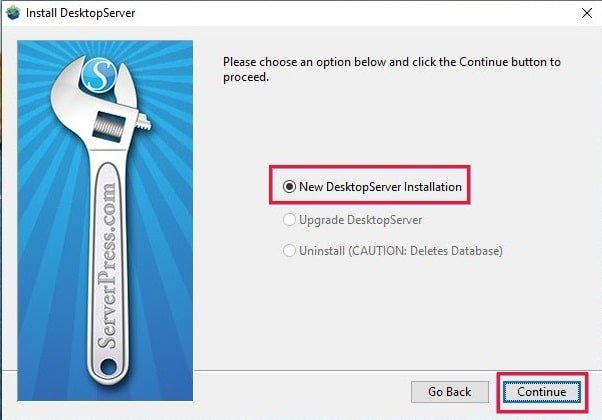
Keep the New Desktop Installation selected and click on Continue. The installation process will start and it may take few minutes to complete.
After it’s done, a popup will appear with a message saying that the installation complete. You will also know the location of the application in your computer directory. Once done, click on Finish.
Step 3: Enabling Plugins and Starting Apache and MySQL Services
After the installation is complete, a multitude of different developer plugins can be enabled:
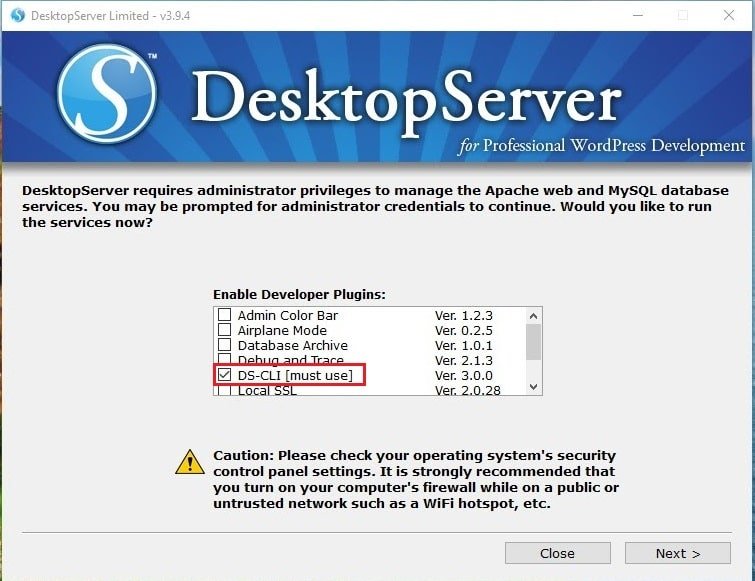
Below is a quick recap of developer plugins that can be used when you install WordPress locally. The bypass login and DS-CLI plugins are highly recommended.
- Airplane mode: You can control loading of external files when you develop locally.
- Bypass login: As a developer you get bypass of login credentials, via quick selection of any of the first 100 usernames in a combobox.
- Clean Import: It allows you to reset .htaccess and clears cache from third-party hosts.
- Debug and Trace: Forces WP_DEBUG = true, and allows cross-platform/language trace statements in PHP and JavaScript.
- Dreamweaver Support: It allows you to create automatic Dreamweaver project file, and a WYSIWYG mode when you work on template files and style.css.
- DS-CLI: It is a cross-platform, enhanced, command-line interface for professional developers. You can easily use CLI, Git, Composer, and PHPUnit. NodeJS and NPM are included to enable installation of Gulp, GRUNT, and other Node dependencies.
- DS-Deploy: It is used to move a site from a local DesktopServer install to a live server.
- InnoDB Autoconvert: You can convert a site’s tables to InnoDB on operations such as Create, Copy, Move, and Import.
- Local Admin Color Bar: It allows you to change the Admin bar color.
- Mailbox Viewer: It offers quick developer offline viewing of mail delivery services.
Remember that some of these options are only available with the premium version. Once done, select Next. Then you will be asked if you want to start web and database services, so hit Next again.
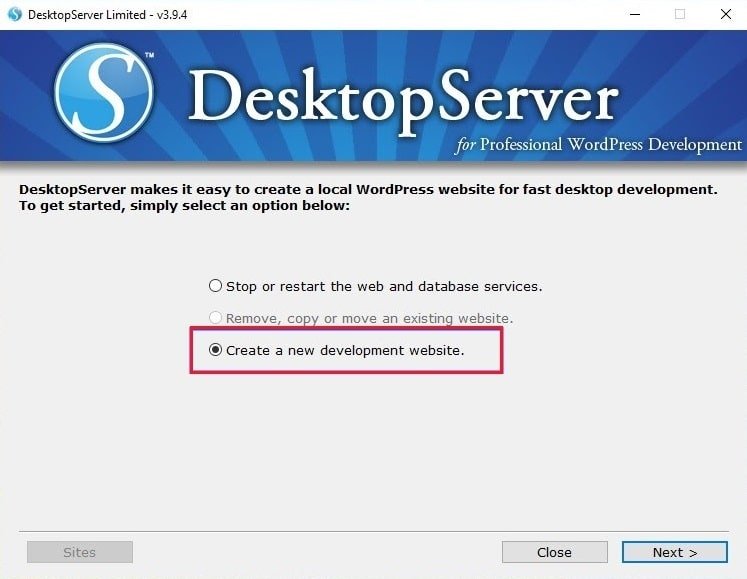
Step 4: Creating a New Development Site
After you have enabled plugins and started the web and database services, you will be prompted for selecting Create a new development website:
Here the program will install WordPress for you. Select your site’s name, which will also be its local address. We are using here “testabc”, so our development URL will be “testabc.dev” on our local machine:
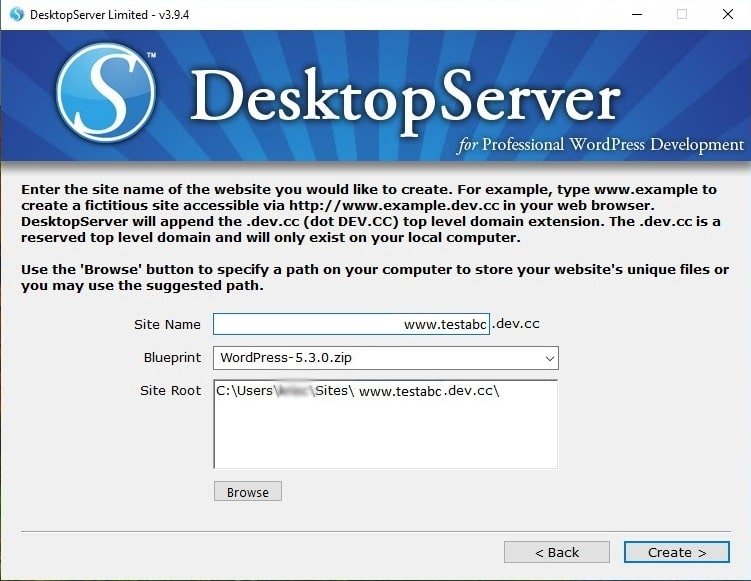
DesktopServer allows you to actually create different blueprints which make it similar to a pre-built template. But here we want to have a fresh installation.
As the default blueprint, DesktopServer has the latest version of WordPress. So, you don’t need to worry about manually downloading it from the repository and unzipping it.
The site’s root is by default located in your My Documents folder. If you don’t have any issue with this, you can leave it as is. But, to make it easy, we changed them to a folder created in the root of our C: drive called “wordpress”.
Once done, click on Create. Then you will see the URL of your local WordPress install. Click on that to complete the installation.
Step 5: Installing and Configuring Your WordPress Site
After clicking on the above mentioned linked, your local WordPress site will open in a browser tab:
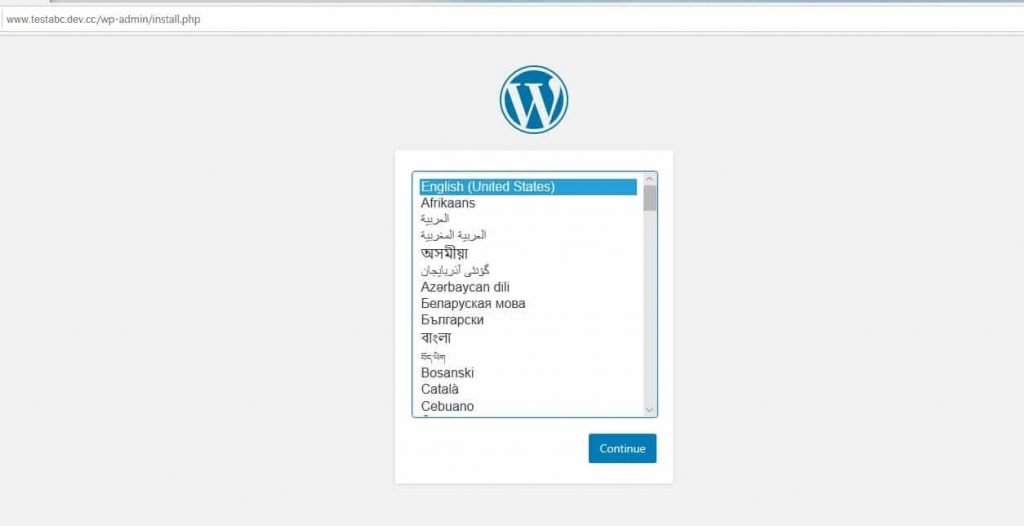
Select your language and click on Continue. You then need to enter your site a title and select a username (in case you want to make the site live later, avoid using “admin” as a username), type a strong password, and your email address:
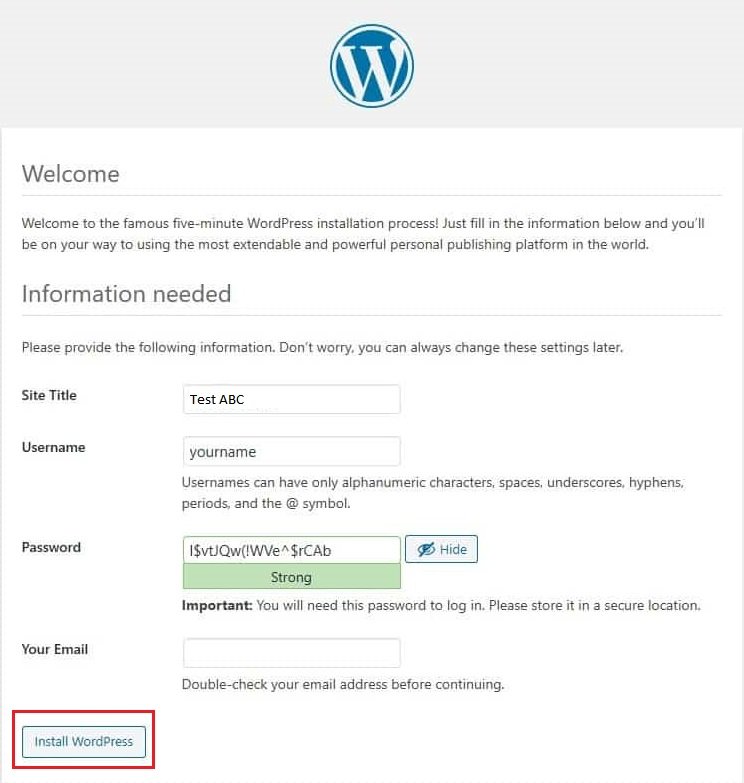
Then, select Install WordPress. That’s it! You have now installed WordPress locally and your site is up and running.
Browse to your local install and test for if your site is working.
Here, we’ll browse “testabc.dev” in our browser’s address bar. Due to the bypass login plugin feature selected during setup, you will get a dropdown menu where you can select the admin and be automatically logged in.
Obviously you won’t be using it on the production site, but it’s easy for a dev environment.
Tips for Using DesktopServer for Installing WordPress Locally
The way Windows manages its file permissions, you may or may not see a message when you log in about WordPress failing to update:

To resolve this issue just open up the command prompt as an administrator and run the below command within your WordPress directory folder: