How to Host a Website in Windows?
[ad_1]
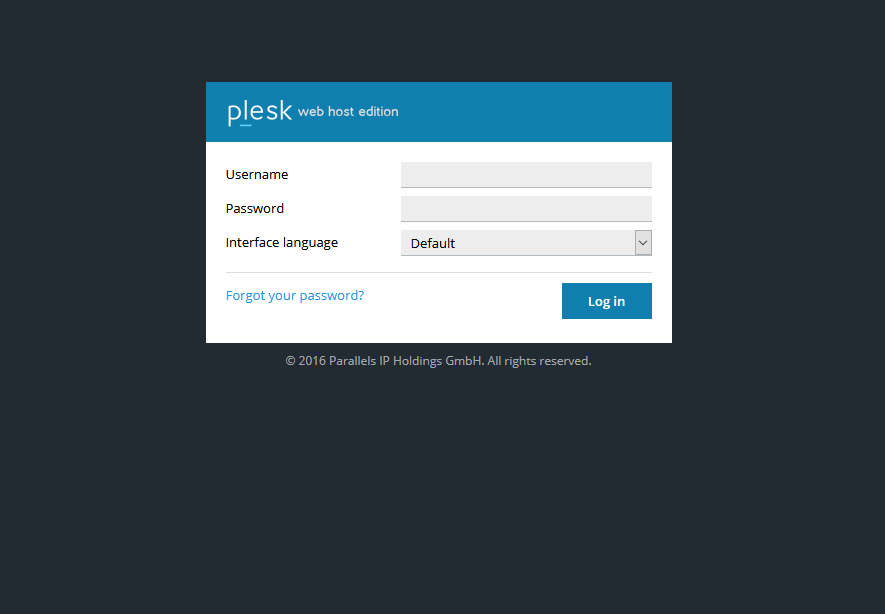
This article guides you how to host a website in Windows Hosting. Hosting a website requires web hosting space and domain name Once you signed up with HostingSewa you get a hosting account information mail for your registered mail id, The mail contains all your hosting server login details. After you purchase a hosting plans, you need to set it up before you can use it to host your website. The login details will be mentioned in the mail that sent to your registered mail id, Subjected to : Hosting Account Information Use the IP address for temporary Purpose and latter you can login by www.domainname.com:8880 Login to your hostingsewa account (Plesk panel) ex URL:http://X.X.X.X:8880/ username: Mailed username password: Mailed Password
2.After logging in click on file Manager under ‘Files’ tab.
 3.Please select a directory to open: (Web Root-HTTPdocs)

4.Please Click on Upload option in the menu.
 5.Please Click on Choose file button and select the file to be uploaded
Note: Folder should be in Zip Format
6.After uploading the Zip File ,Click on Extract Button to extract the files.
5.Please Click on Choose file button and select the file to be uploaded
Note: Folder should be in Zip Format
6.After uploading the Zip File ,Click on Extract Button to extract the files.
 7.A confirmation message will appear.
Please visit the Link for uploading files in video format
https://www.youtube.com/watch?v=JBW0Qo8LCbc
7.A confirmation message will appear.
Please visit the Link for uploading files in video format
https://www.youtube.com/watch?v=JBW0Qo8LCbc
[ad_2]
This article guides you how to host a website in Windows Hosting. Hosting a website requires web hosting space and domain name Once you signed up with HostingSewa you get a hosting account information mail for your registered mail id, The mail contains all your hosting server login details. After you purchase a hosting plans, you need to set it up before you can use it to host your website. The login details will be mentioned in the mail that sent to your registered mail id, Subjected to : Hosting Account Information Use the IP address for temporary Purpose and latter you can login by www.domainname.com:8880 Login to your hostingsewa account (Plesk panel) ex URL:http://X.X.X.X:8880/ username: Mailed username password: Mailed Password
2.After logging in click on file Manager under ‘Files’ tab.
3.Please select a directory to open: (Web Root-HTTPdocs)
4.Please Click on Upload option in the menu.
5.Please Click on Choose file button and select the file to be uploaded
Note: Folder should be in Zip Format
6.After uploading the Zip File ,Click on Extract Button to extract the files.7.A confirmation message will appear.
Please visit the Link for uploading files in video format
https://www.youtube.com/watch?v=JBW0Qo8LCbc
[ad_2]